TSD Beam Rebar
The TSD Beam Rebar plugin automates the creation of reinforcement in Autodesk Revit using beam rebar data and the provided detailing directly from Tekla Structural Designer (TSD) through the TSD API. Instead of relying on CAD exports and manual interpretation, the add-in uses structured TSD output to drive rebar placement in Revit, supporting a more consistent, traceable link between structural design intent and the BIM model.
An earlier DXF-based proof of concept explored mapping from TSD exports; that path proved difficult to keep reliable at production quality, so the API-connected workflow is the supported direction. For background on the retired approach, see TSD Beam Rebar DXF (POC).
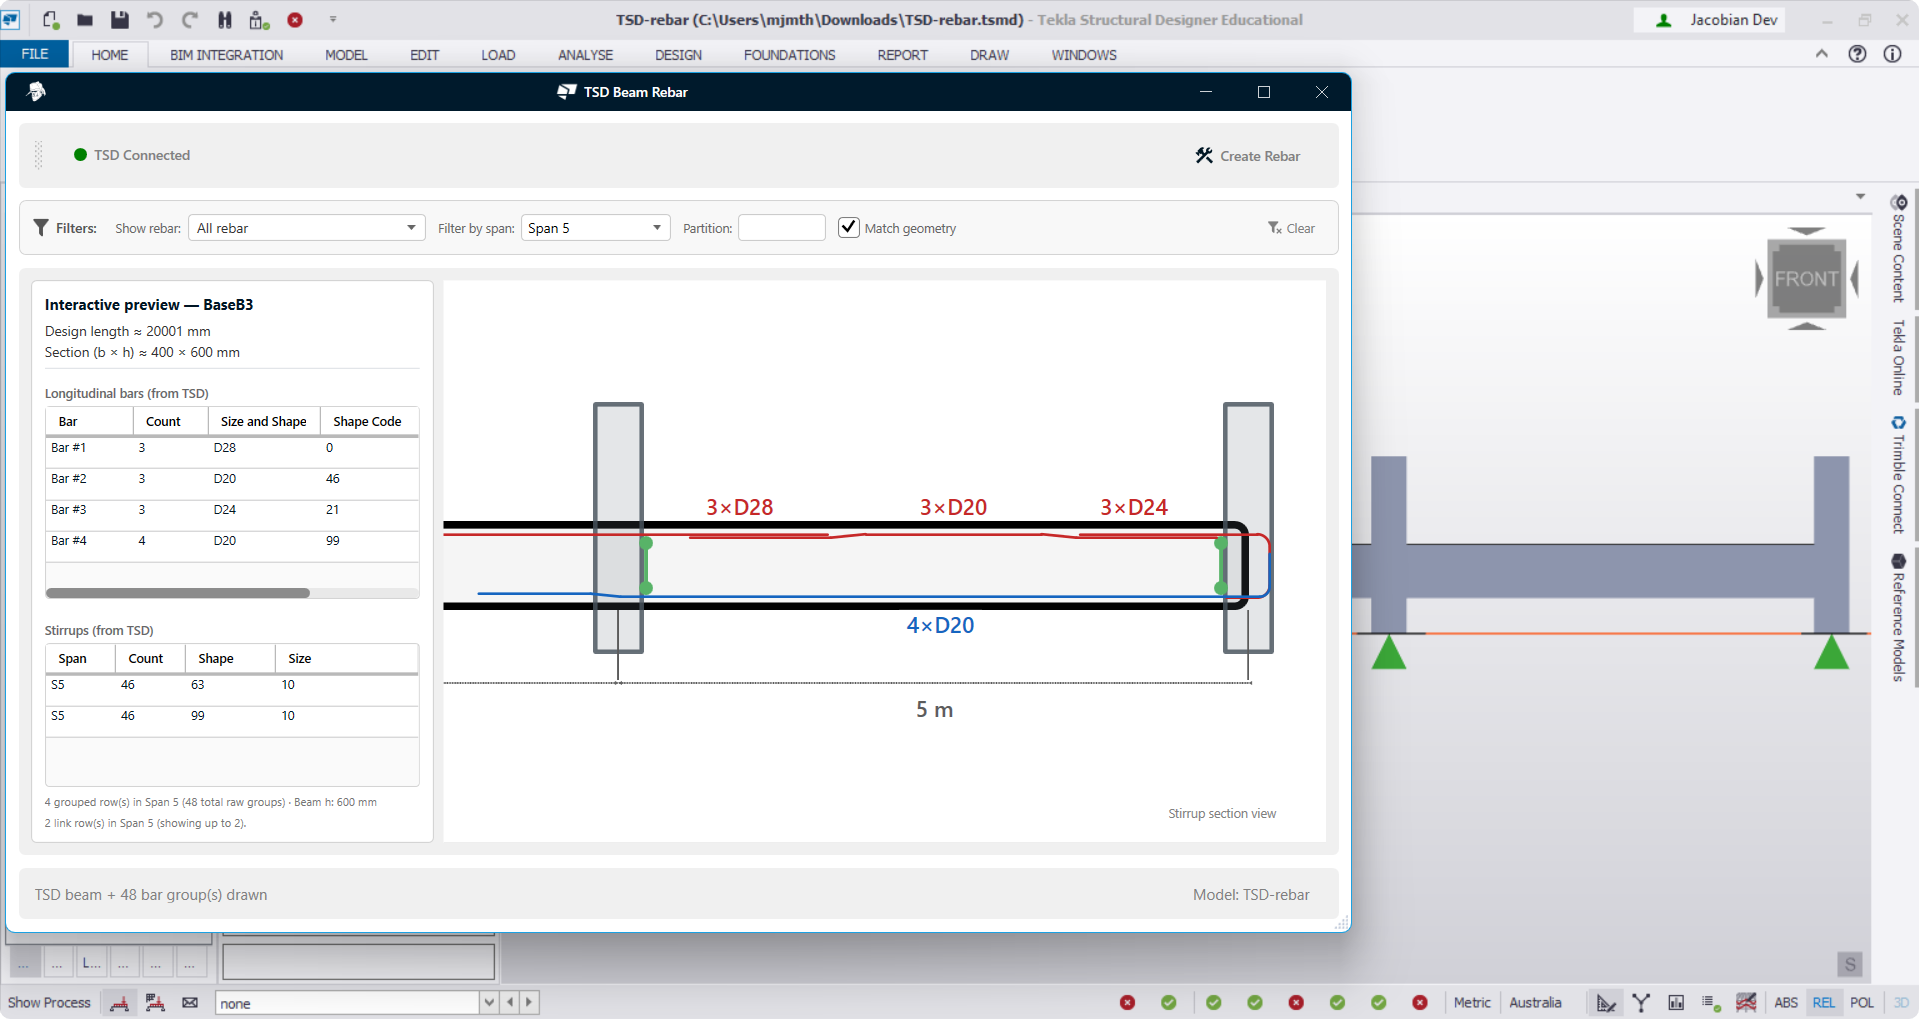
Figure 1.1: TSD Beam Rebar plugin overview
Features:
-
Connect to TSD (start)
- The start screen walks you through the required order of operations.
- Click Connect to TSD to establish a session with Tekla Structural Designer over the TSD API. A connection succeeds only when TSD is running and a model is open; otherwise the add-in cannot attach to a live session.
- After you are connected, select a beam in TSD. That selection defines which element the add-in reads rebar data from so mapping into Revit can begin from the chosen TSD member.
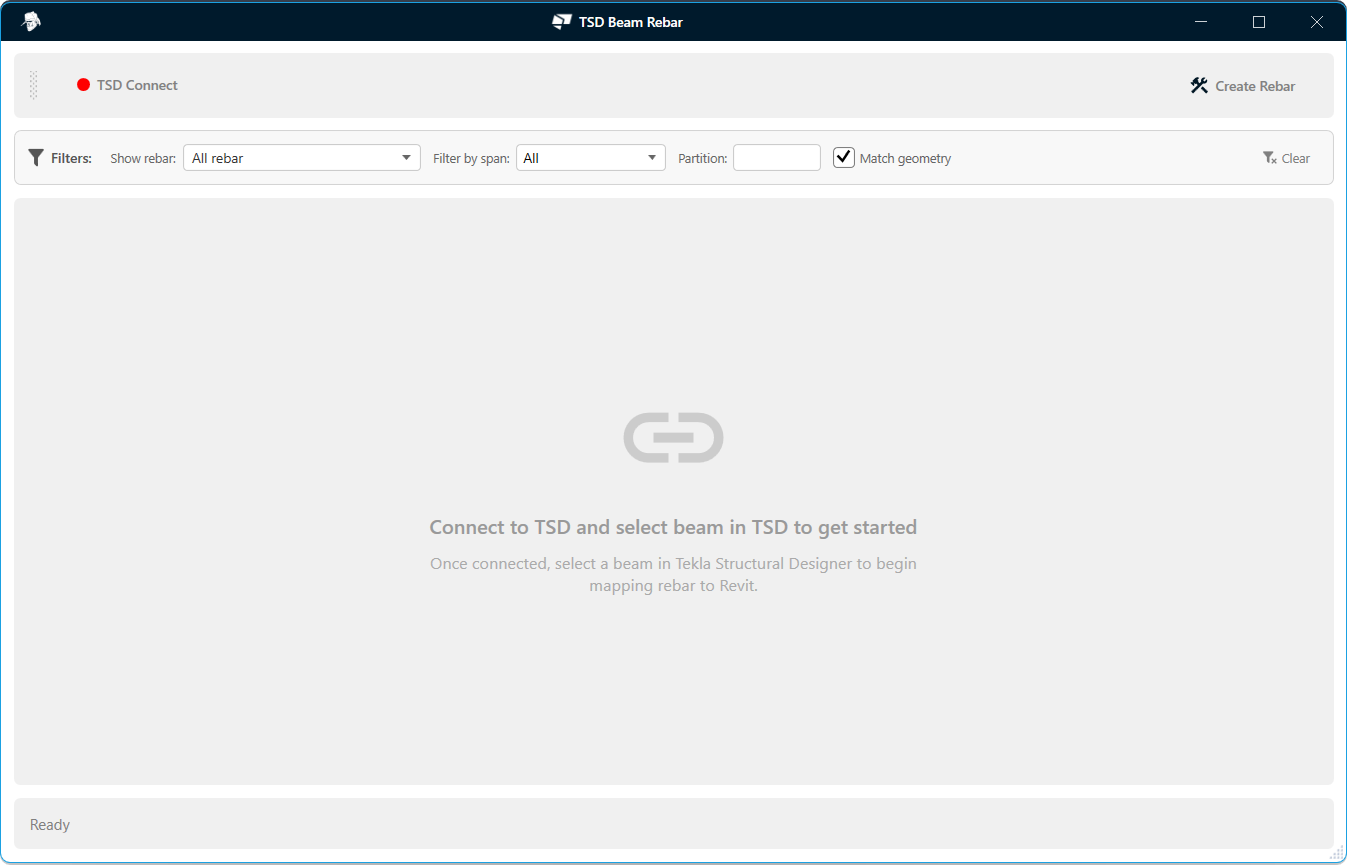
Figure 1.2: Start screen — connect to TSD, then select a beam in TSD
-
Interactive rebar preview (left panel)
- After rebar data is read from TSD, the add-in shows the full detailing output in an interactive preview on the left of the window.
- Longitudinal reinforcement is listed in a table-style layout with shape code, bar size, and layer (and related fields as provided by TSD) so you can review what will drive Revit placement.
- Stirrup data is shown below the longitudinal table, keeping longitudinal and transverse reinforcement logically separated while still on the same screen.
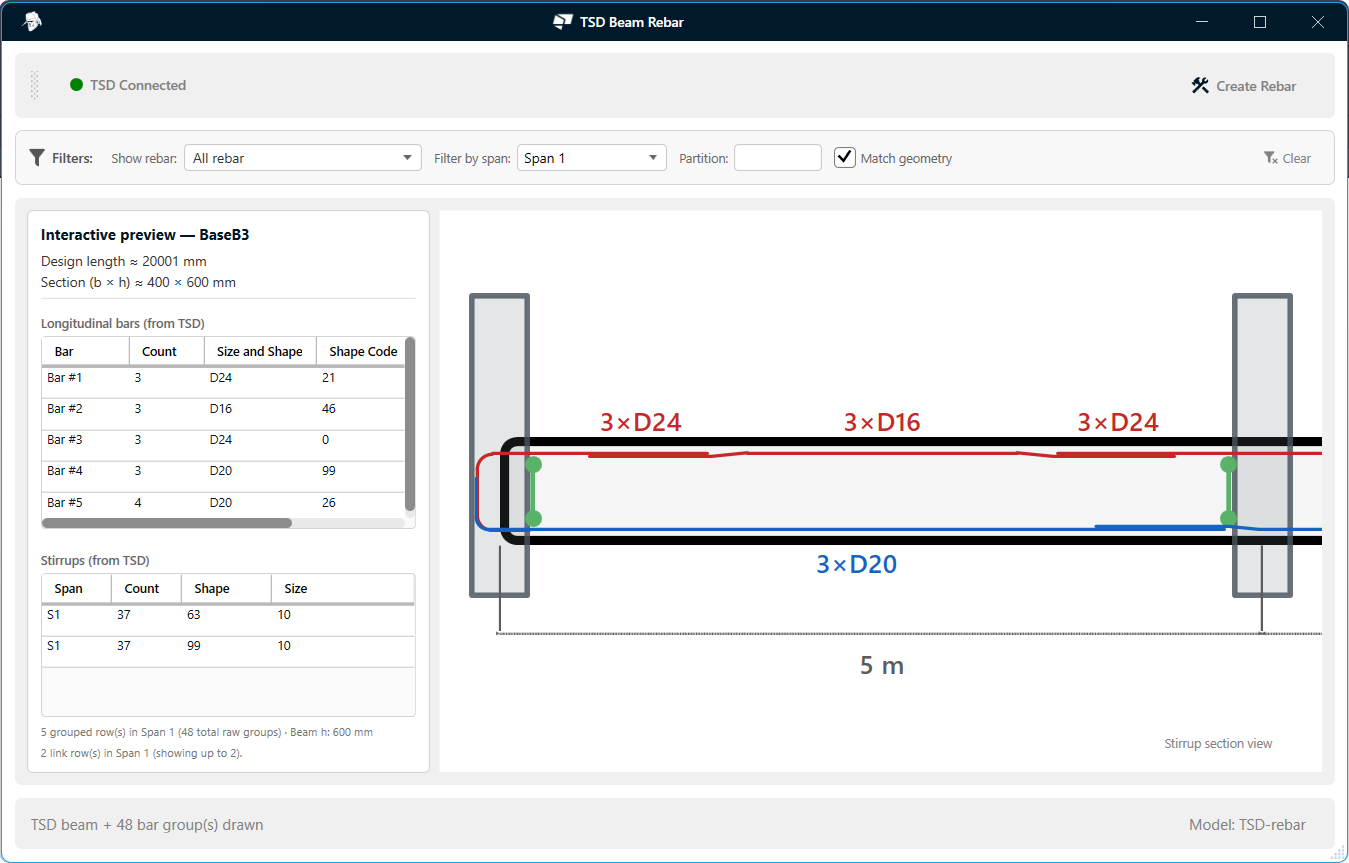
Figure 1.3: Interactive preview — longitudinal table with stirrup data below
-
Layer and span filtering
- Use layer filters to control what appears in the preview: show only top, side, or bottom longitudinal reinforcement, or isolate stirrups. Focusing one layer at a time reduces visual noise and makes it easier to confirm bar positions before committing changes in Revit.
- Use span filters to step through a continuous beam system span by span. That workflow supports systematic checks across support lines and length segments without losing context of the overall member.
- Together, layer and span filtering help you target quality control where it matters — whether you are validating a single layer in one bay or comparing detailing consistency across multiple spans.
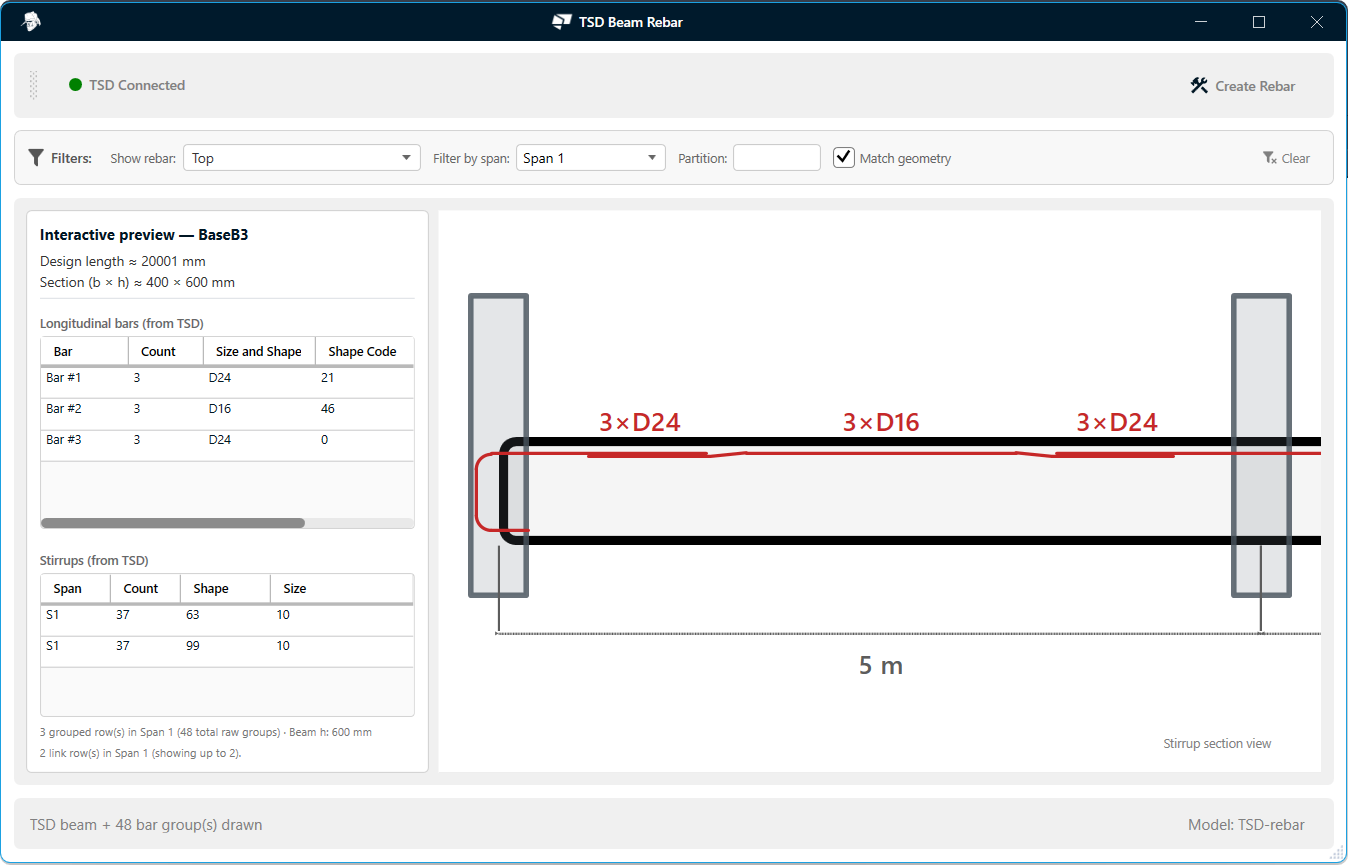
Figure 1.4: Filtering the preview by reinforcement layer and by span
-
Rebar creation from filter selection
- Only the rebar groups that are checked in the filter (Top, Bottom, Side, Stirrups) will be created in Revit when you click Create Rebar. This gives you precise control over what is placed in any given pass — for example, create longitudinal bars first and add stirrups in a separate run, or generate everything at once.
-
Match Detailing Mode
- Match Detailing Mode is a key option that determines how closely the created reinforcement follows TSD's design output.
- When enabled, the reinforcement geometry follows TSD's detailing rules as defined by the design code selected in the TSD model. This includes cranked bars, curtailment lengths, anchorage details, and any other code-driven adjustments that TSD applies to the rebar layout.
- When disabled, reinforcement is created using simplified geometry and shape codes, leaving it to the user to implement the required detailing rules manually. This mode is useful when you want a clean starting point in Revit and prefer to manage detailing adjustments yourself.
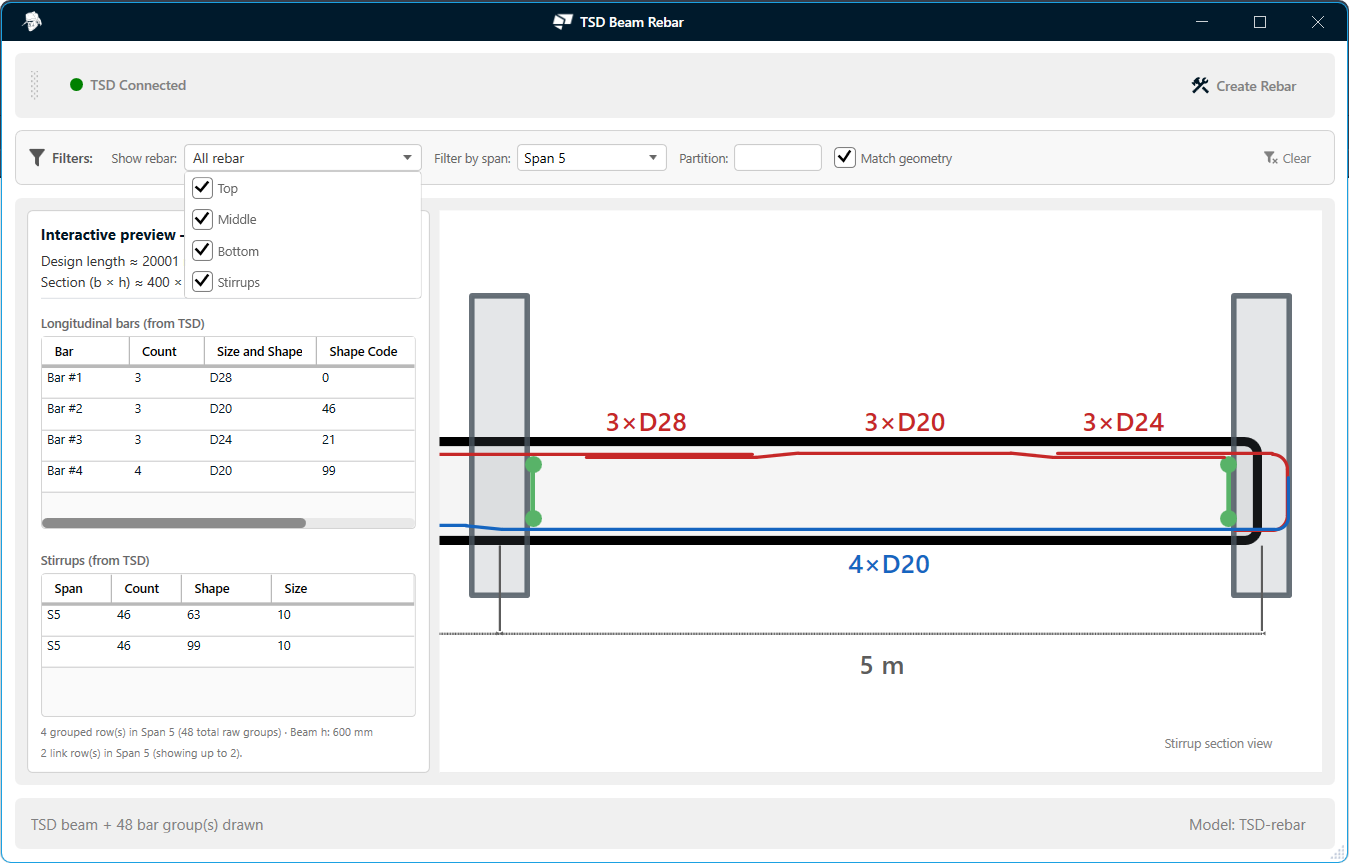
Figure 1.5: Rebar creation from filter selection and Match Detailing Mode
-
Full-span preview
- For continuous members, a full-span graphic shows how detailing extends along the beam run, helping you relate individual span filters to the overall layout of longitudinal bars and links along the system.
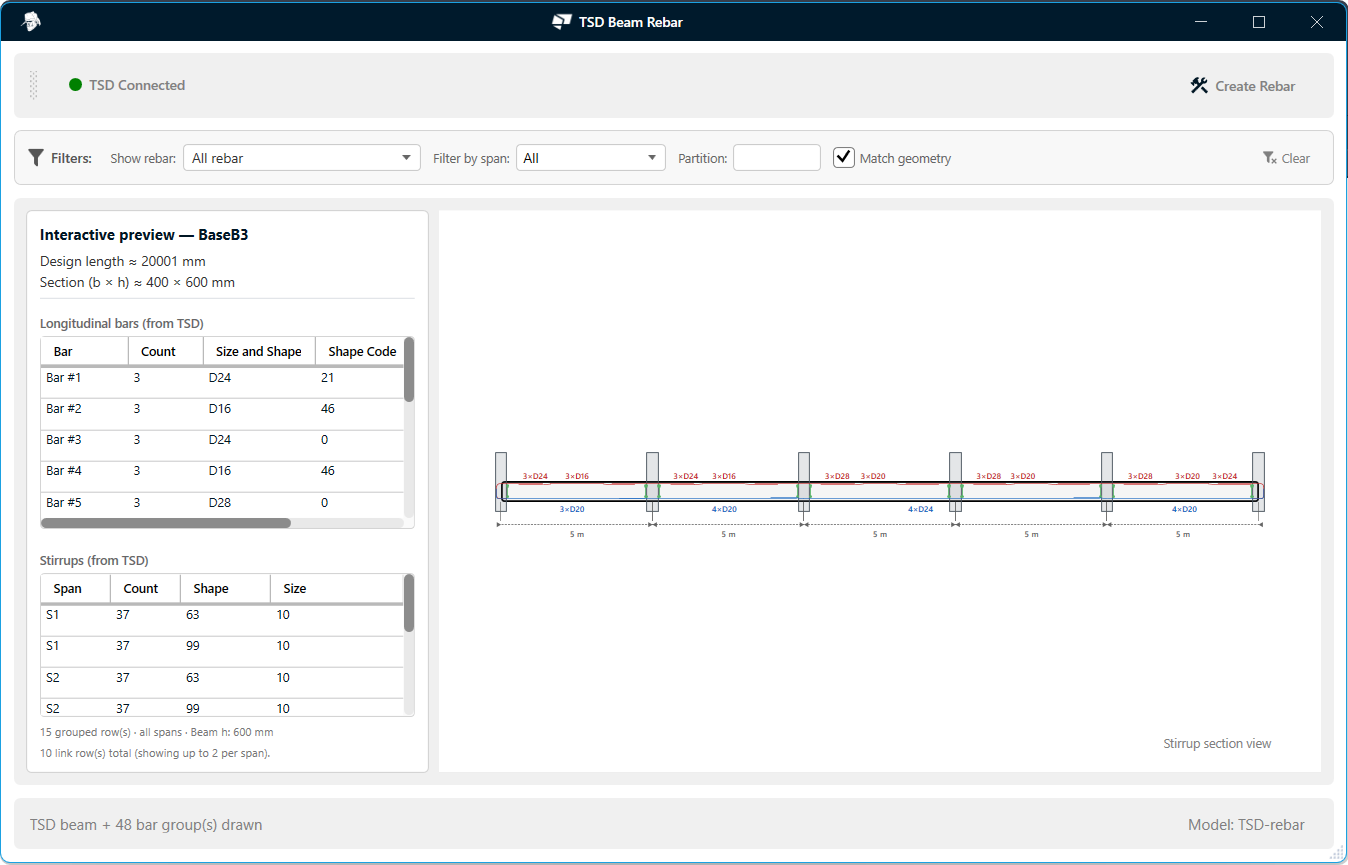
Figure 1.6: Full-span preview along the beam system
-
Section view (longitudinal vs stirrups)
- The add-in includes a Section View of the beam that visualizes stirrups from TSD and where longitudinal bars sit relative to those stirrups, so you can confirm the intended cage layout before anything is built in Revit.
- You can switch between a longitudinal presentation and a stirrup-focused view of the same section, making it easier to validate bar layers and stirrup geometry without hunting through the model.
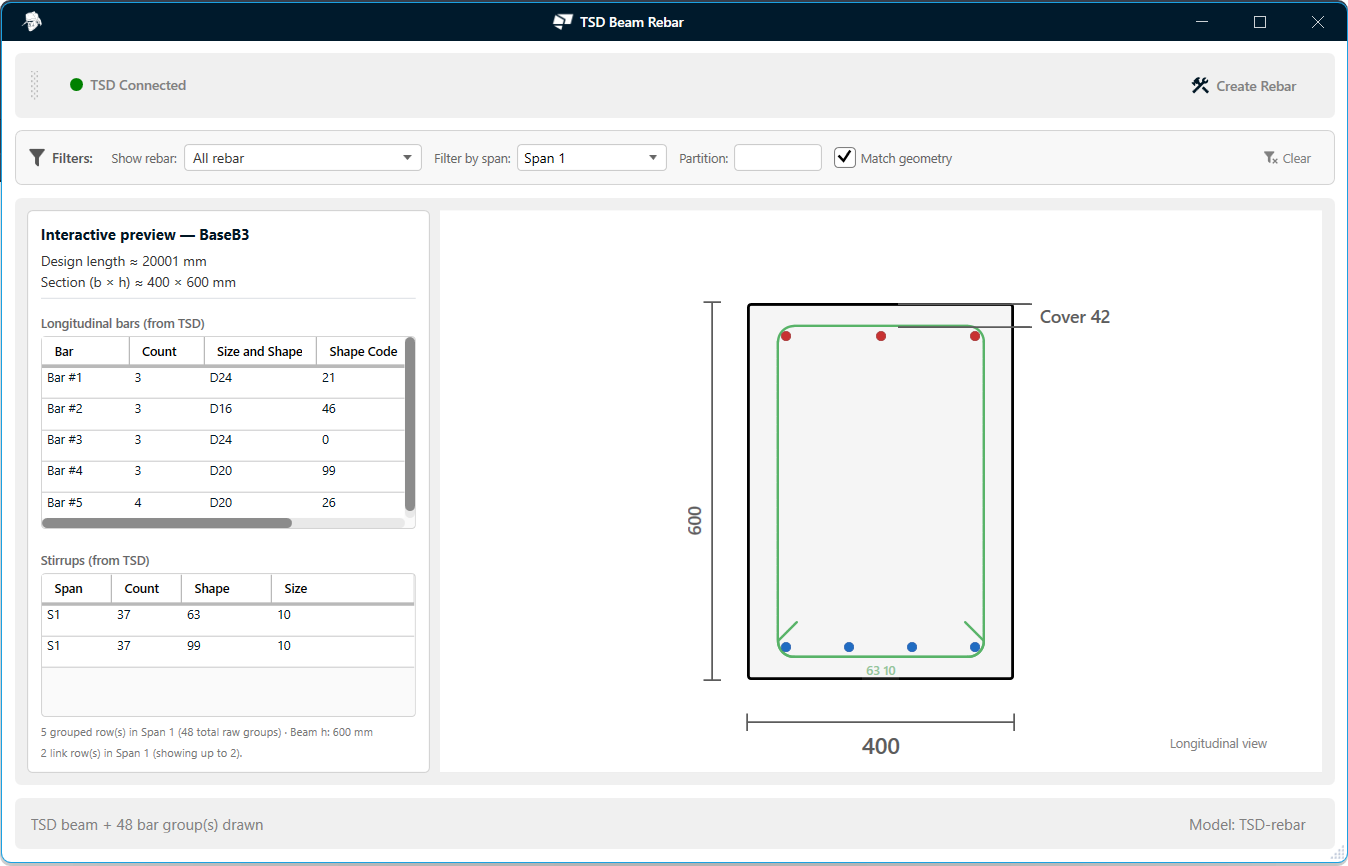
Figure 1.7: Section view — toggle between longitudinal and stirrup display
-
3D view of created rebar
- After Create Rebar, you can review the placed reinforcement in a Revit 3D view to confirm stirrups, longitudinal bars, and overall cage layout match what you validated in the add-in.
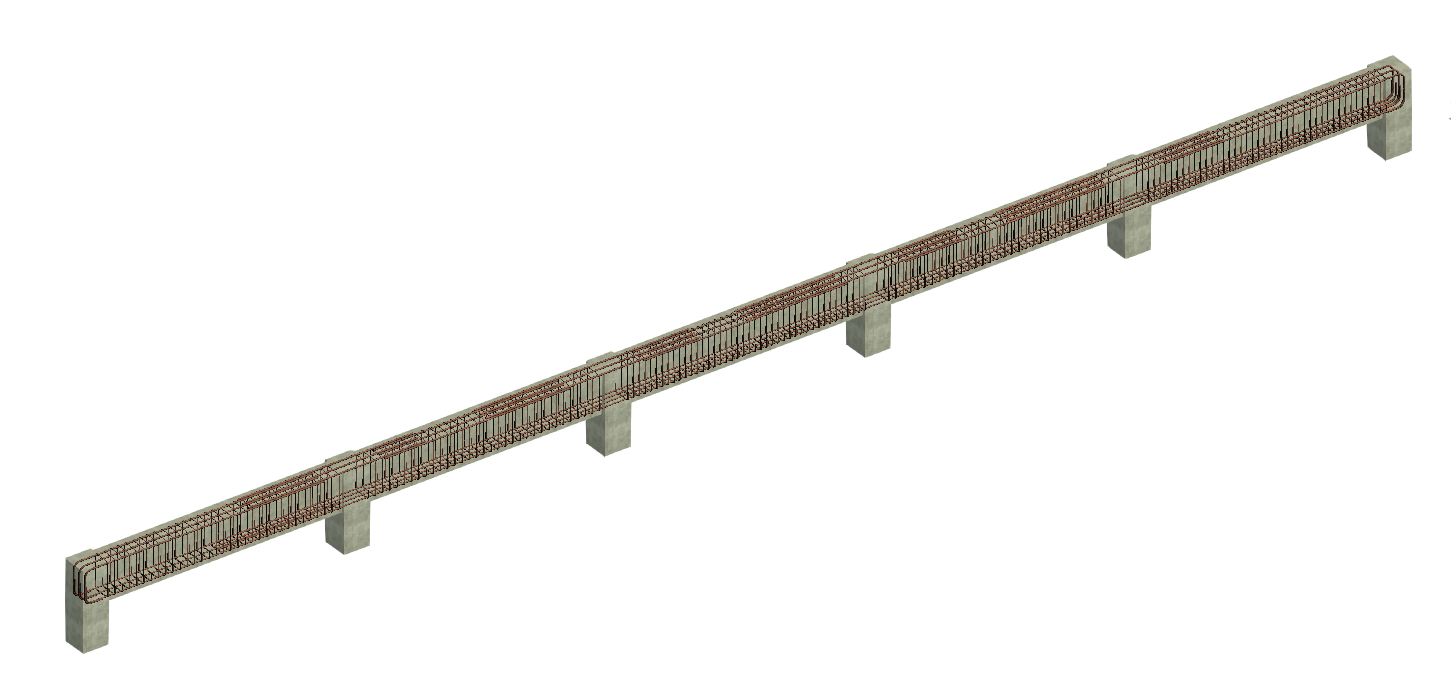
Figure 1.8: 3D view of rebar created from TSD data
Video Demonstration
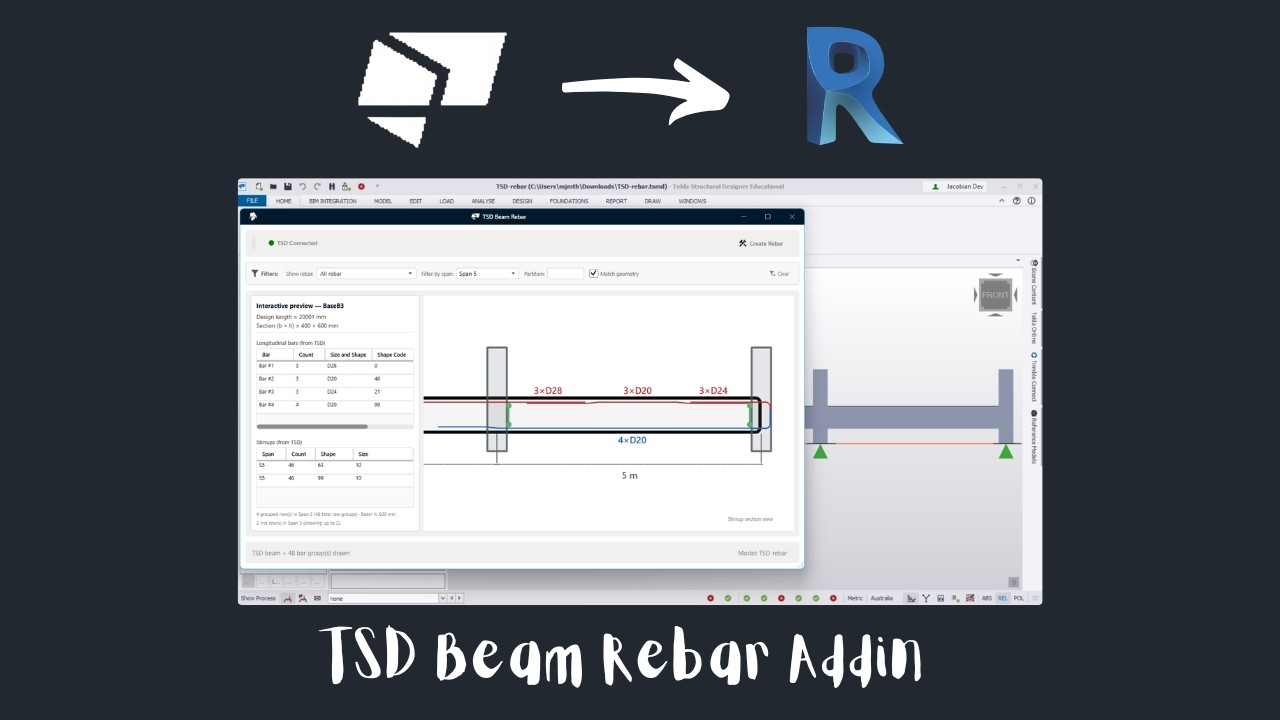
Watch the video below to see how the TSD Beam Rebar plugin works:
Download Plugin
Anyone can download the plugin and use it for 30 days. After that, you need to be a YouTube member to continue using the plugins.
- v1.0.4Latest18 Nov 2026 · 29.7 MB · Adds Wall Rebar.
- v1.0.34 Nov 2026 · 29.0 MB · Adds Foundation Rebar.
- v1.0.220 Sep 2026 · 13.7 MB · First public release.